
Ever watched a film where scenes shift seamlessly, leaving you engrossed in the story? Or perhaps, while reading a book, you’ve felt the flow of one chapter transitioning effortlessly into the next? That smooth progression, that tiny moment of satisfaction, is what we experience in a presentation when one slide gracefully moves to another. That’s the magic of transitions at play.
Step-by-Step Guide: Add Transitions to Google Slides
Are you ready to enhance your presentation? Let’s break it down step by step!
- Open Your Google Slides Presentation: Ensure you have your presentation open and are ready to get started.

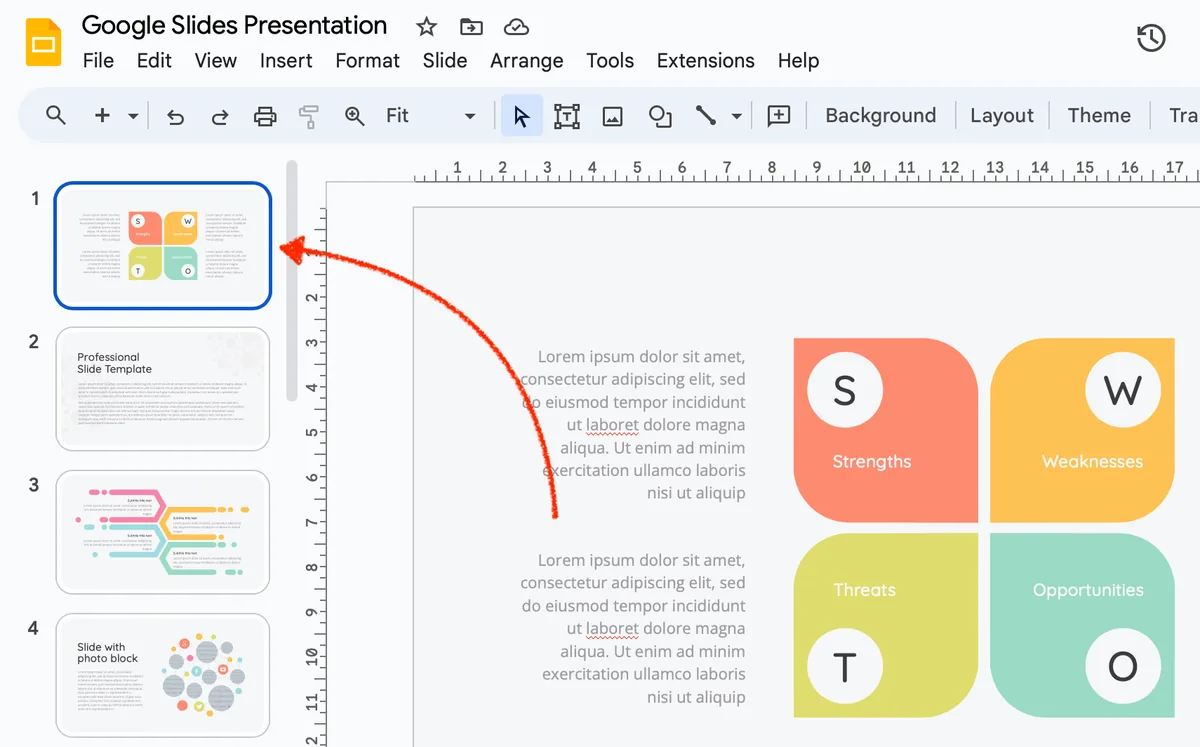
- Navigate to the Slide: Click on the specific slide you’d like to add a transition to. Remember, each slide can have its unique transition or you can maintain a consistent style throughout.
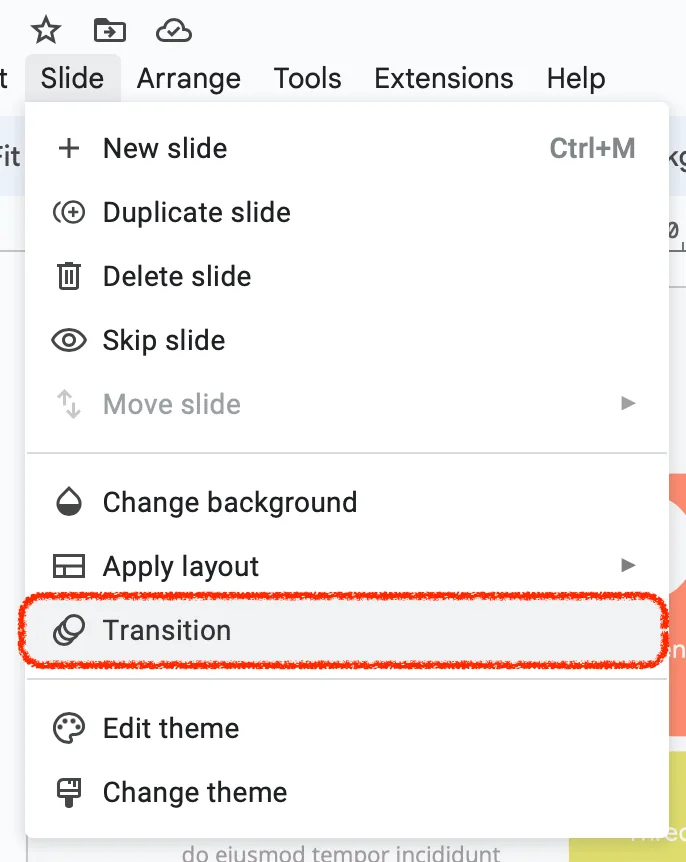
- Accessing Transition Options: On the toolbar at the top, you’ll notice the Slide menu option. Click on Slide, and from the dropdown, select Slide transition.

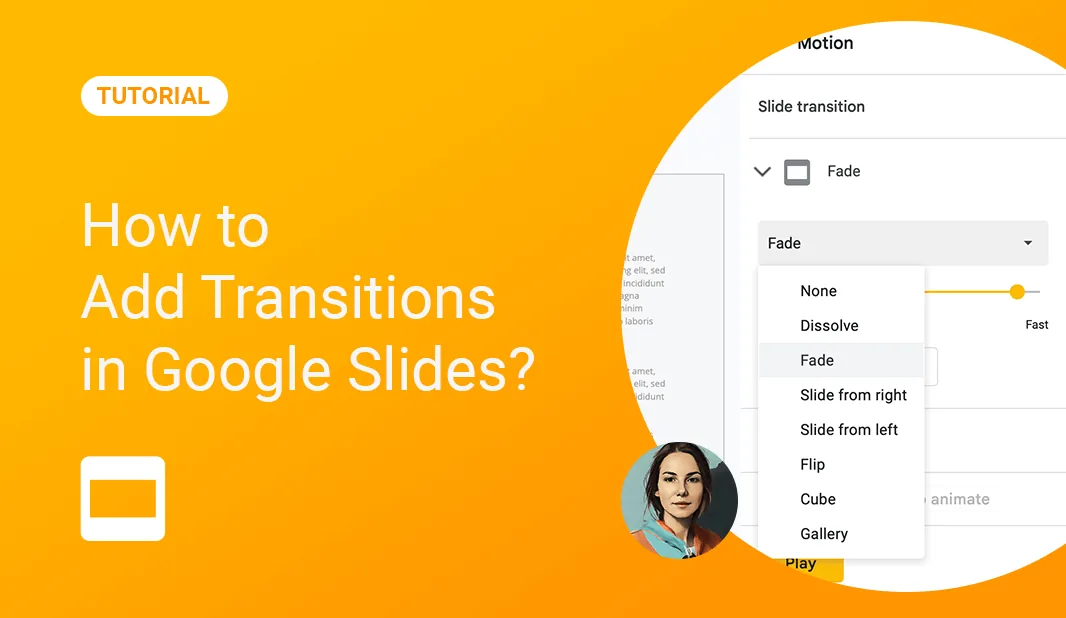
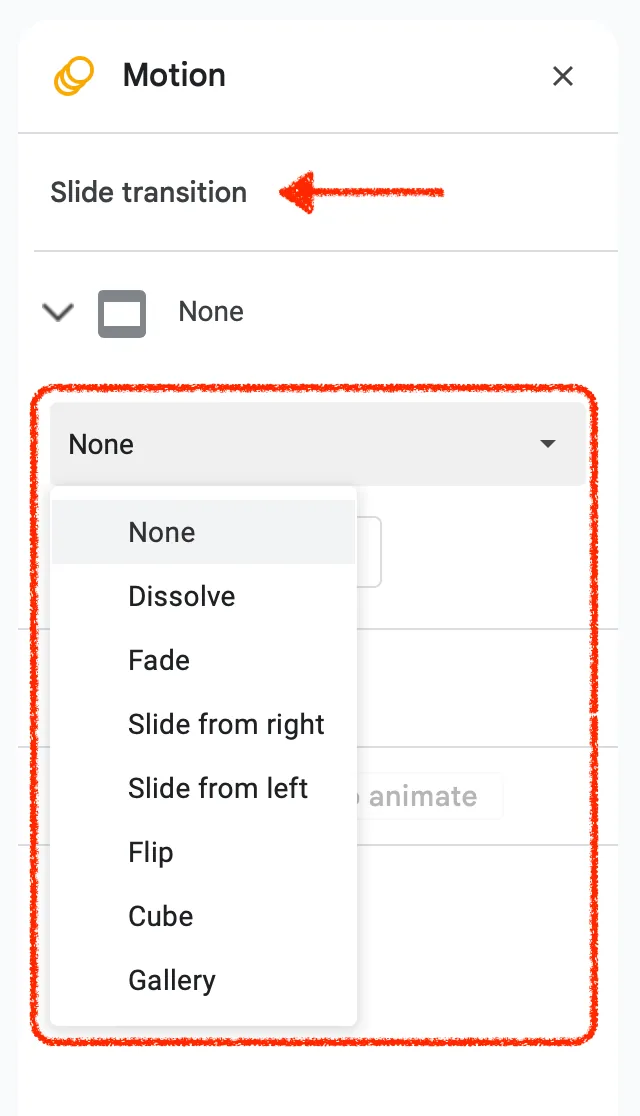
- Choose the Transition Style: On your right, a sidebar will appear, titled ‘Slide’. Under the section ‘Transition’, you’ll be presented with a dropdown menu. Click on it. A plethora of options await you here. From fades to flips, choose a transition that matches the vibe of your presentation.
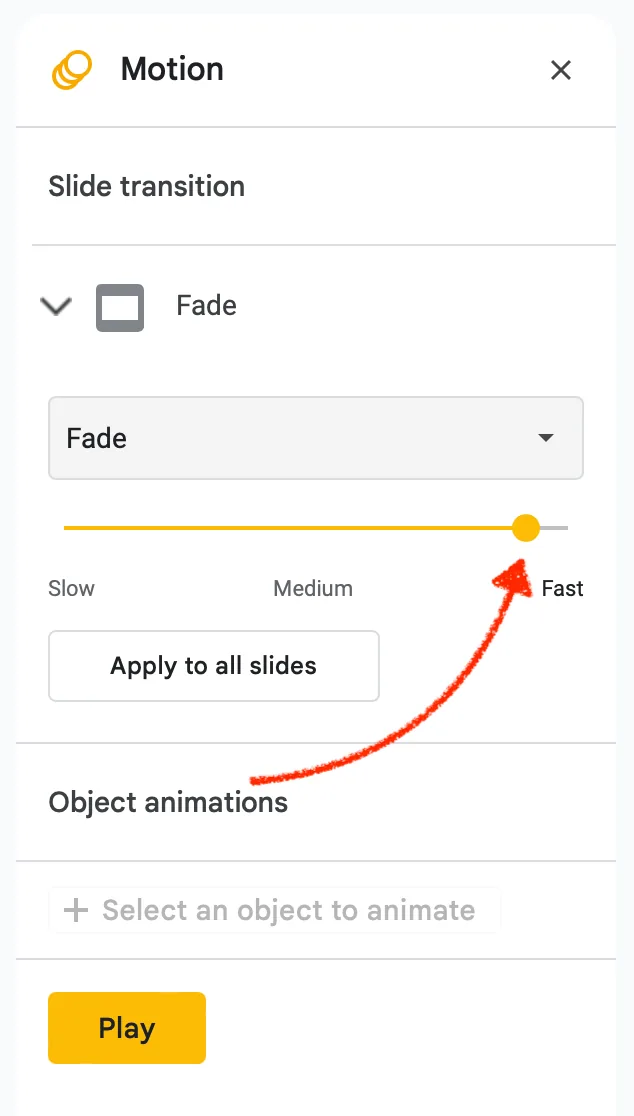
- Adjust Transition Speed: Below the transition styles, there’s a slider labeled ‘Duration’. Drag this slider left or right. Moving to the left makes the transition faster, while moving to the right slows it down. Find the perfect speed that isn’t too fast or too slow.
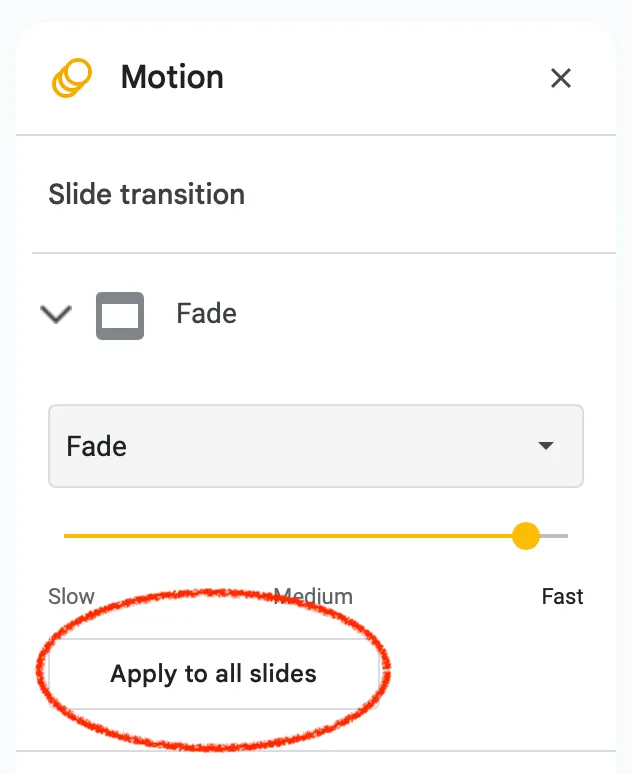
- Applying Transitions to All Slides: If you’d like the same transition effect applied throughout your presentation for uniformity, there’s a button at the bottom of the sidebar labeled ‘Apply to all slides’. Click it, and your chosen transition will be applied to every slide. However, as a pro tip: sometimes, using a variety of transitions at strategic points can make your presentation more engaging.
With these steps, you’ve successfully added transitions to your Google Slides. Remember, while transitions add flair, they should enhance, not overshadow, your content.
Enhancing Presentations with Advanced Transitions in Google Slides
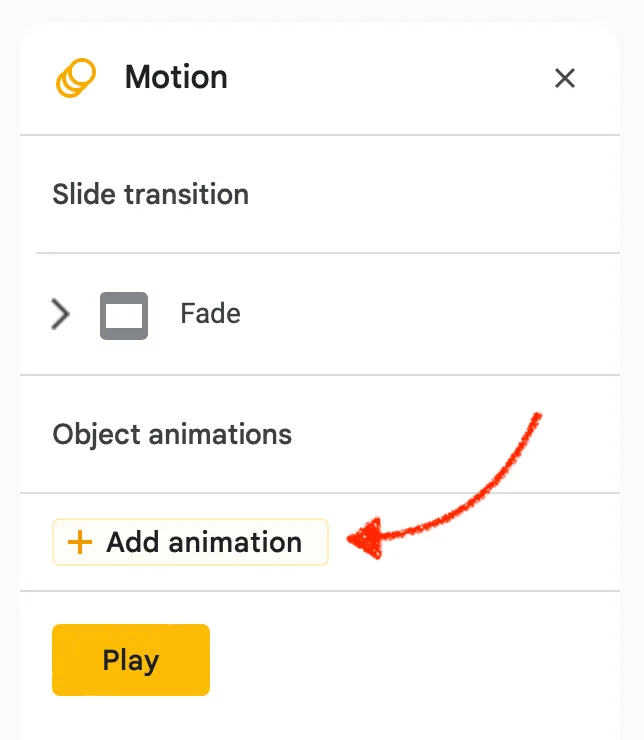
Layered Transitions:Imagine creating a masterpiece on a canvas. It’s never about just one brushstroke but the amalgamation of many. Similarly, in Google Slides, you can blend object animation effects, allowing multiple animations on a single text or an image. This means, instead of moving from one slide to the next with a single effect, you can layer them for added depth and emphasis.
How to Add Layered Transitions: Select the animated object you want to apply another effect to, right-click, and from the drop-down menu, choose the next animation. You can add multiple animations to the same object and adjust the order in which they play, creating a fluid layered effect.
Common Mistakes to Avoid with Transitions and Animations in Google Slides
Transitions and animations are wonderful tools at your fingertips when creating a slideshow in Google Slides. However, like every tool, they need to be used with care. Here’s what you should be wary of:
- Overloading Your Slides: While it’s tempting to animate every object, text, or picture on your slide, too much motion can be overwhelming. The principle to remember? Less is often more. Don’t just add animations or transitions because you can; use them to highlight key points.
- Losing Consistency: If you choose an animation in Google Slides, consider adding it consistently across relevant slides. Jumping from one style to another can be jarring.
- Misaligned Transitions: Always ensure your transitions in Google Slides align with your presentation’s theme. For instance, a corporate presentation might not benefit from overly flashy transitions.
- Incorrect Timing: The time you allot for your transitions and animations is crucial. Too fast, and your audience might miss it; too slow, and you risk losing their attention.
- Overlooking the “By Paragraph” Feature: If you’re animating a text box and you want to animate each paragraph separately, make sure to select the “by paragraph” option in the animations pane.
- Overusing “Apply to All Slides”: While the apply to all slides option is convenient, using it without discretion can make your presentation monotonous. It’s often better to apply Google Slides transitions individually to maintain variety.
- Not Previewing: After you’ve added to the selected object, always preview your animations and transitions. The play button in the pane will help you see how they appear on the slide.
- Neglecting Mobile Users: If a chunk of your audience will view your presentation on an app or iPad, ensure your transitions are mobile-friendly.
- Overlooking Additional Features: Once you click the transition or animation you want, a pane will appear on the right. This pane allows you to adjust the speed of the transition, decide whether the animation starts on a click or automatically, and add more animations. Not exploring the drop-down menu means you’re missing out on tailoring your animation perfectly.
- Redundancy: If you want to add more animations to a slide, ensure they serve a purpose. For instance, if you’ve already highlighted a word, you might not need to put another animation on the entire sentence.
Transitions, when used correctly in Google Slides, can elevate your presentation, making it more engaging and professional. Remember, it’s not about using the most transitions, but about using the right ones effectively.