
Ever watched a presentation and thought, “Wow, that background really ties everything together!”? Backgrounds in PowerPoint can make or break your presentation. They set the tone, mood, and can even influence the perception of your content. Let’s dive into the world of PowerPoint and explore how to add or change backgrounds to make your slides pop!
Steps to How to Add or Change a Background in PowerPoint
1. Open Your PowerPoint PresentationFirstly, open your PowerPoint presentation where you want to add a background. This is the canvas where you’ll be making your changes.
2. Select the Slide for the BackgroundIn the slides pane on the left side of the screen, select the slide you want to change. If you want to apply the background to every slide, you can do that later.
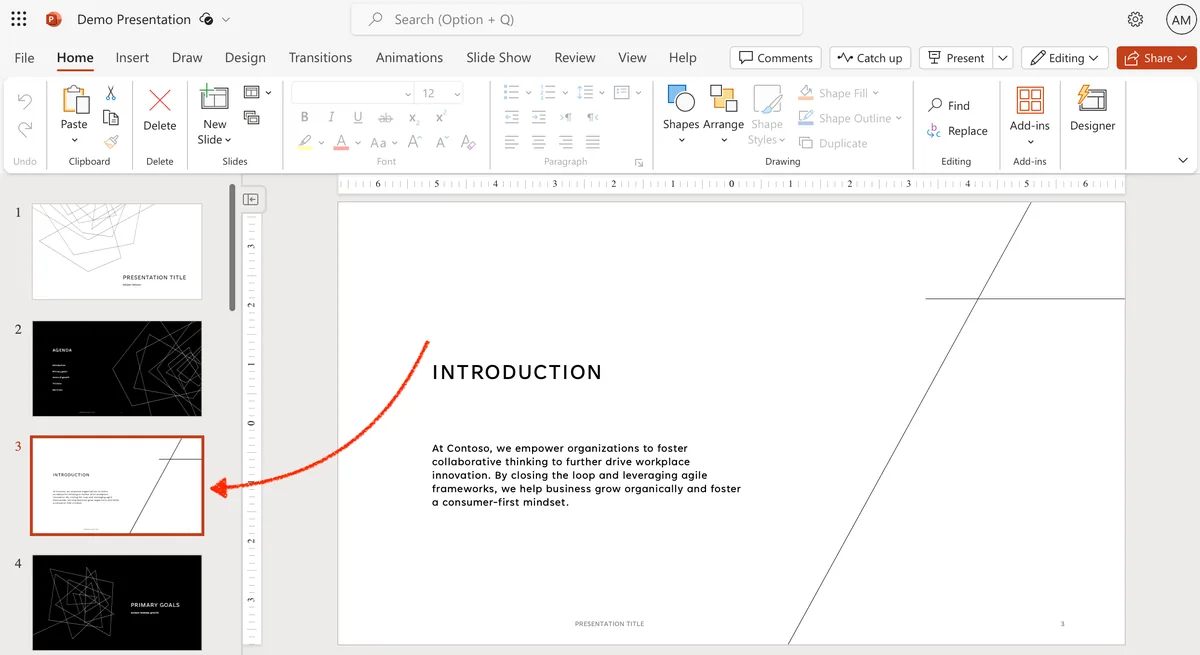
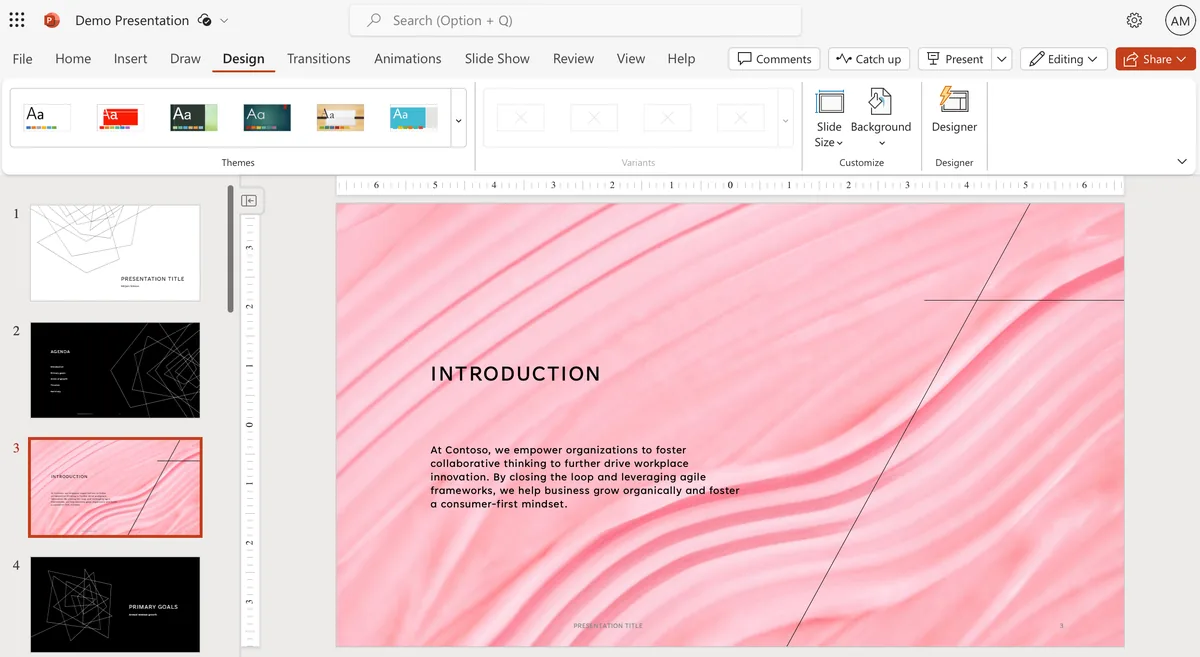
3. Navigate to the Design TabOn the top menu, click on the “Design” tab. This is where most of the background styles and designs are housed.

4. Choosing a BackgroundPowerPoint is a powerful tool with a plethora of options to create and add background graphics:
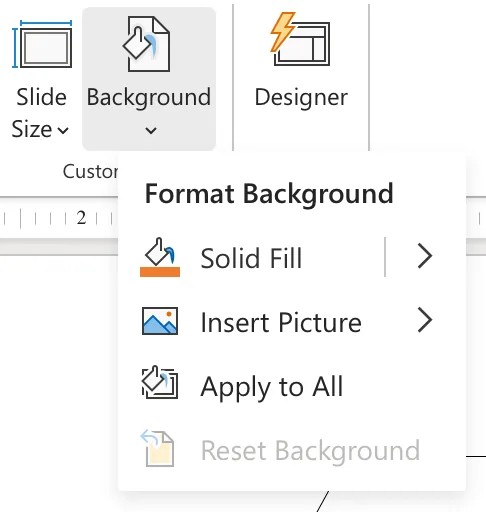
a. Using Pre-Defined Themes:
- Click on the desired theme from the available options. These themes will change the PowerPoint background and design elements to give a cohesive look to your PowerPoint slides.
b. Add a Background Image in PowerPoint from Built-in Options:
- Click on the drop-down arrow next to the themes.
- Choose a background style from the options that appear on the right side of the screen.
5. Customizing with Personal ImagesTo add a background picture that’s personal and unique:
- Right-click on the slide you want to change.
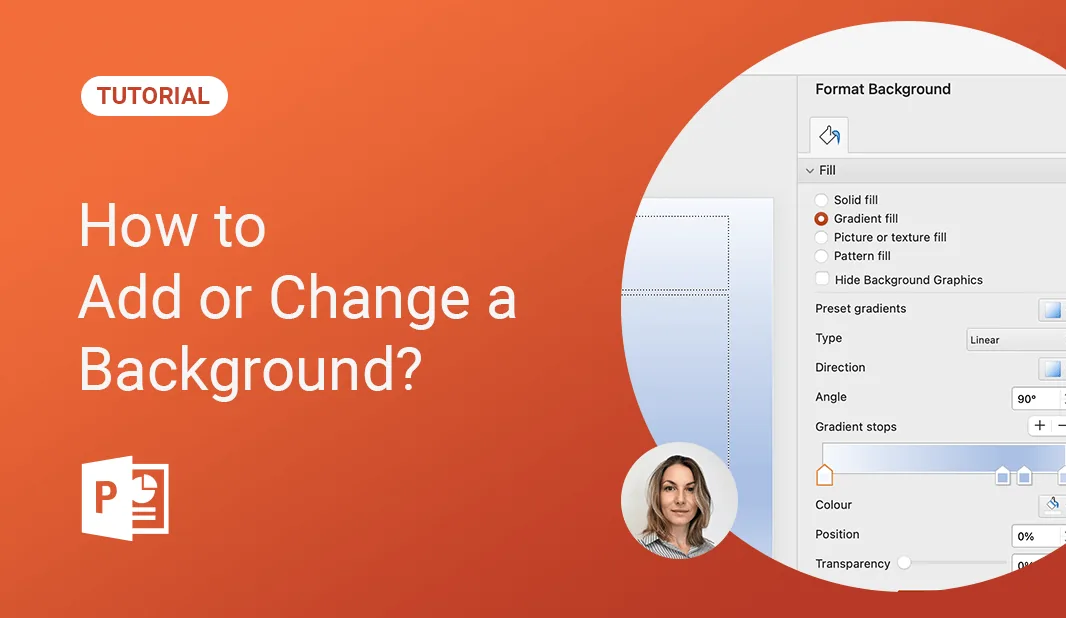
- From the dropdown, select “Format Background”. The Format Background sidebar will appear on the right.
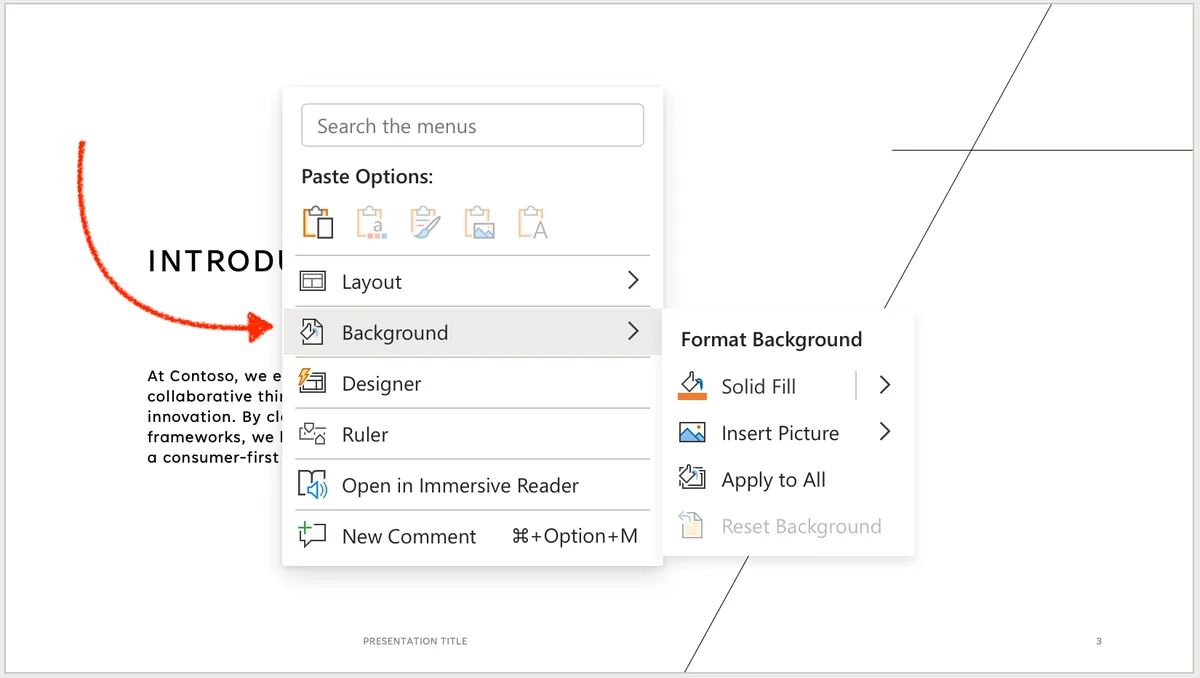
- Click on “Picture or texture fill”. The options to insert background images in PowerPoint will become available.
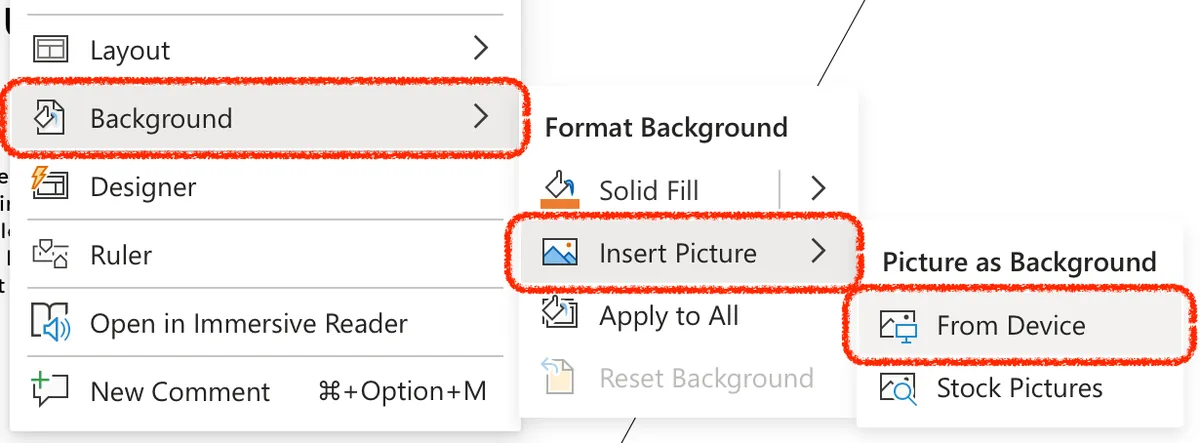
- To add an image from your computer, click on “File” under the “Insert picture from” section. Navigate to the image you want and select it. e. If you’d rather not insert an image from your computer, you can also choose images from stock options or use the tile picture as texture feature for a repeating pattern.
6. Using Gradient Backgrounds (Not supported by all PowerPoint versions)For those who prefer a gradient over a photo or background picture:
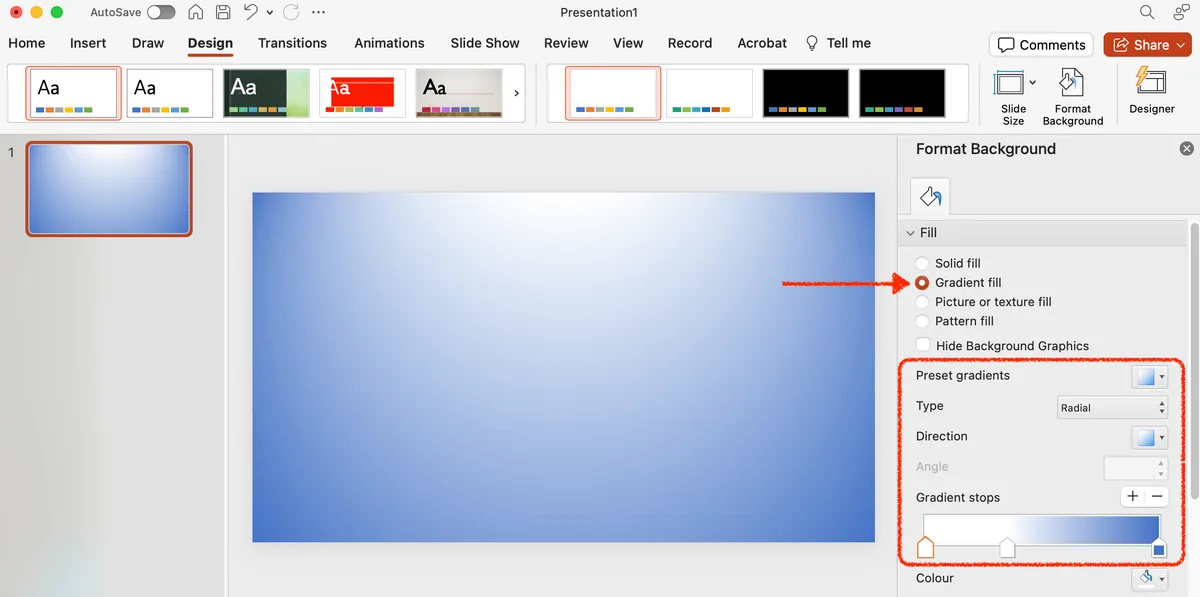
- In the “Format Background” pane, select “Gradient fill”.
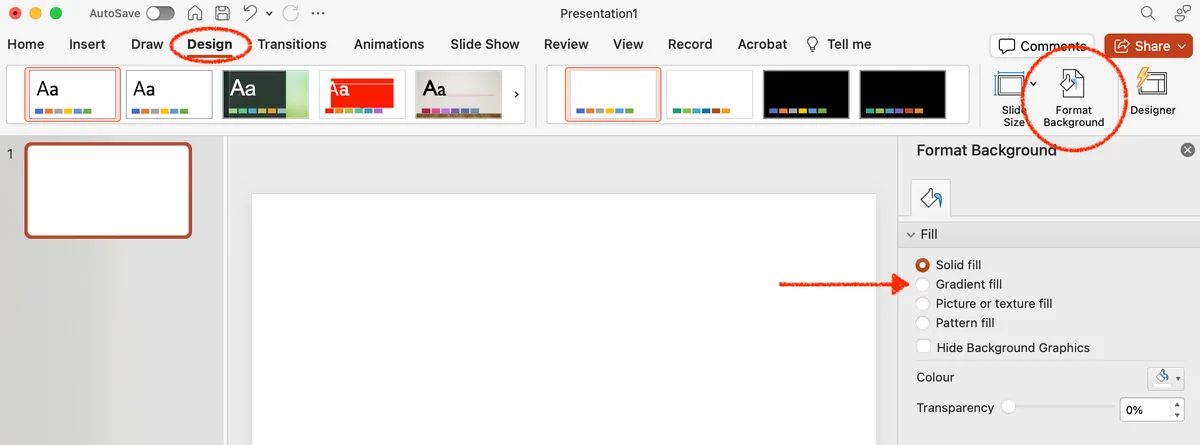
- Play around with the options available until you find a gradient that complements your PowerPoint slides. You can adjust the background colors, direction, and gradient type.
7. Applying the Background to All SlidesIf you want the background image in PowerPoint to be consistent across all slides:
- In the Format Background sidebar, at the bottom, you’ll see an option labeled “Apply to All”. Clicking this will apply the background to all slides in your presentation.

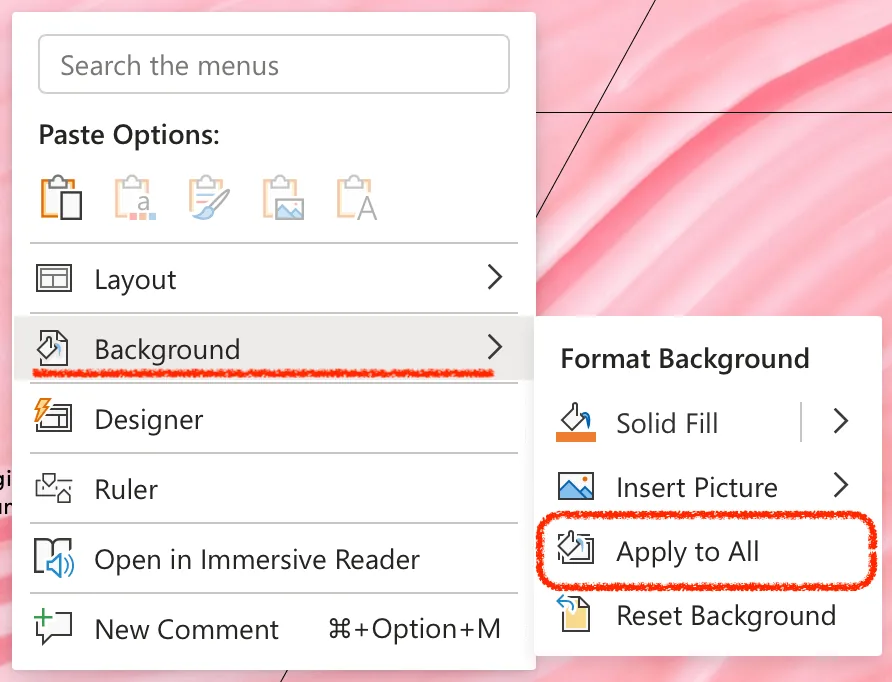
- If you only want to apply the background to selected slides, simply select the slides you want in the slide sorter view and then apply the desired background.
8. Adjusting the BackgroundSometimes, the background may not fit perfectly. To adjust:
- In the Format Background menu, you can adjust options like transparency, offset, and more to make your presentation look just right.
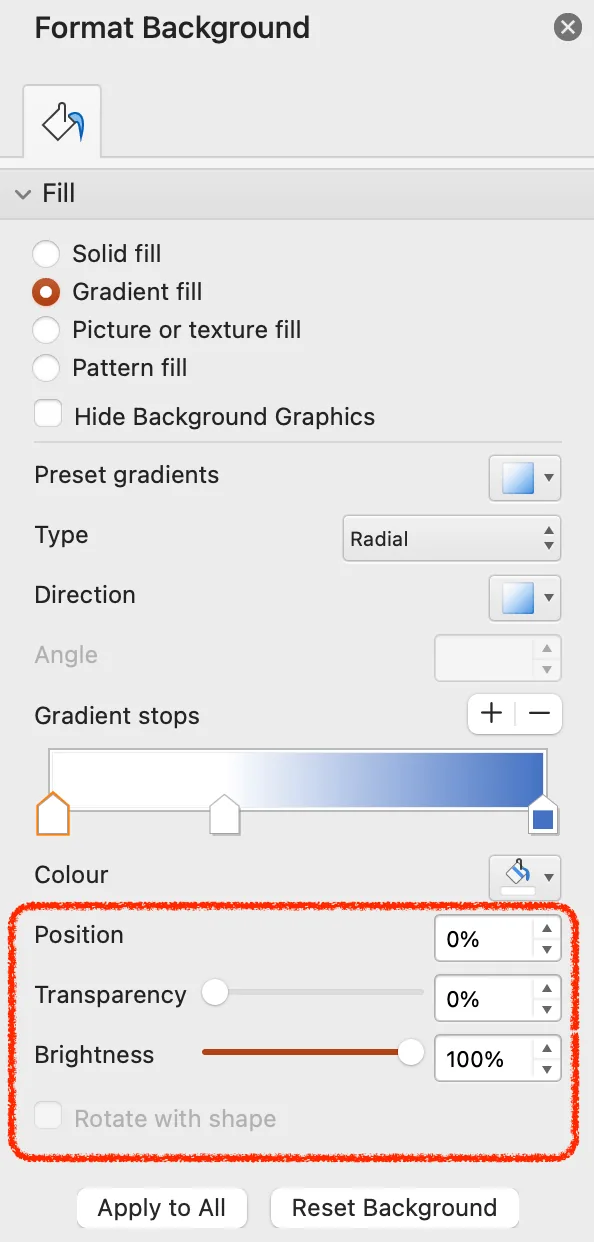
9. Review Your ChangesAfter adding images and graphics, review your presentation. Ensure that the background changes will only apply where you want them, and that the text is still readable against the new background.
How to Add a Background Using Master Slides in PowerPoint
Master slides are the backbone of your PowerPoint presentation, ensuring consistency across all slides. By setting a background in the master slide, you can ensure that all your slides have the same background, saving you time and ensuring uniformity. Let’s delve into the steps to add a background using master slides.
1. Open Your PowerPoint PresentationBegin by launching PowerPoint and opening the presentation where you want to add a background.
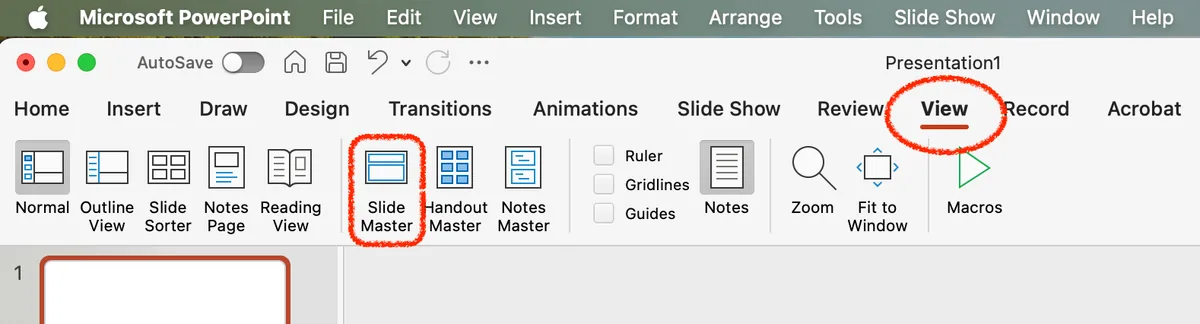
2. Access the Slide Master ViewNavigate to the “View” tab on the top menu. From there, select “Slide Master” from the “Master Views” group. This will open the master slide view, where you’ll see a collection of slide layouts. Can be located in different places in the menu depending on the version you are using.
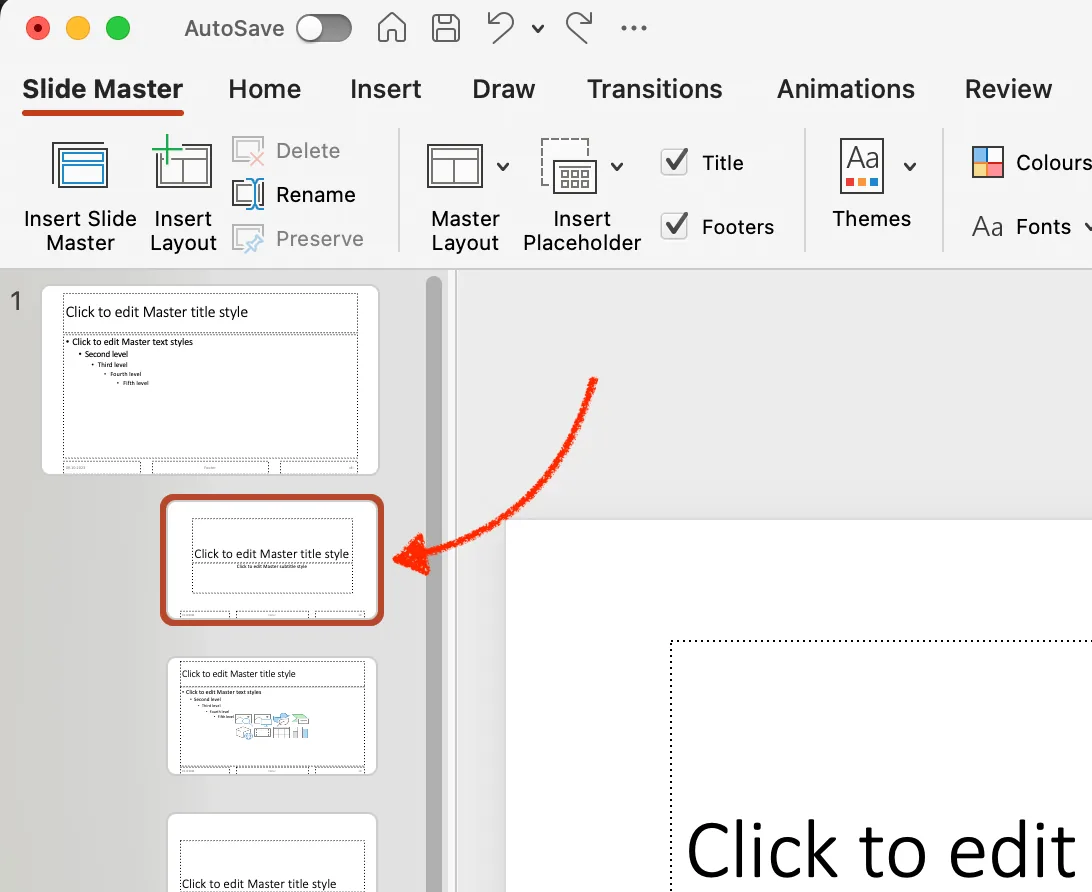
3. Select the Master SlideOn the left pane, you’ll see a list of slide thumbnails. The topmost slide is the master slide, which controls the overall look of your presentation. Click on this slide to select it.
4. Add a Background to the Master SlideWith the master slide selected:
- Right-click on the slide and choose “Format Background” from the dropdown menu. This will open the Format Background pane on the right side of the screen.
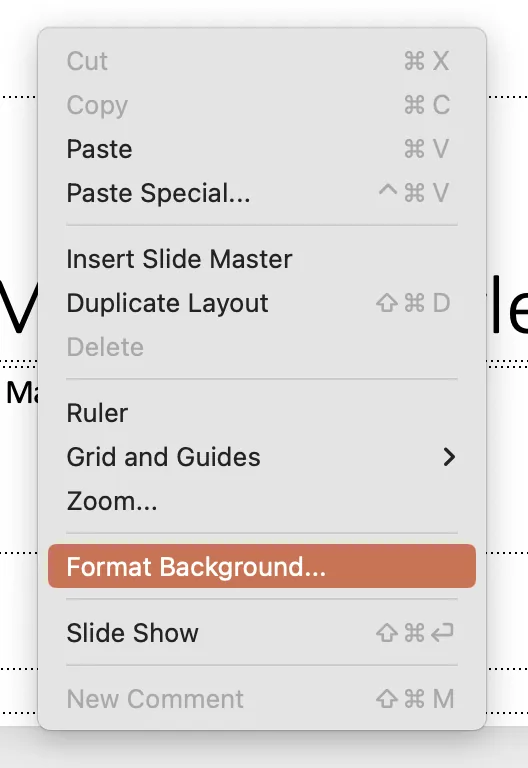
- Here, you have multiple options: – Solid fill: Choose a solid color as your background.– Gradient fill: Create a gradient background by selecting multiple colors and adjusting their direction and transition.– Picture or texture fill: To add a background image or texture, click on “File” to insert an image from your computer or choose from the available textures.– Pattern fill: Select from various patterns and choose the colors you prefer.
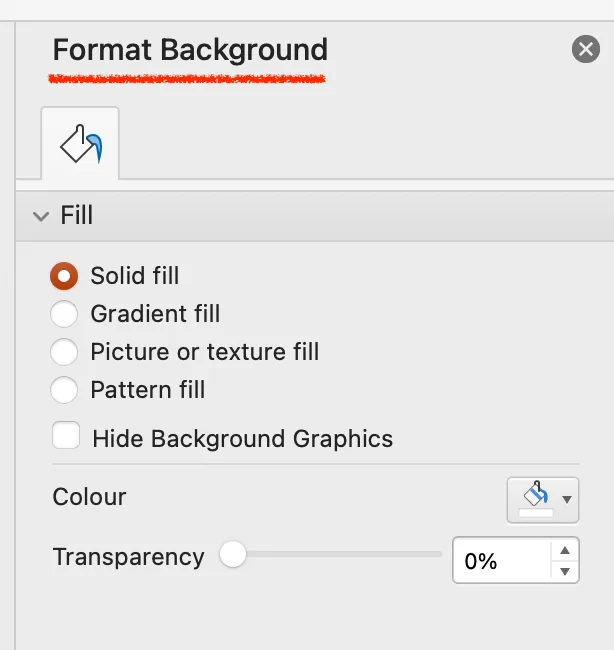
5. Apply to All Slide LayoutsOnce you’ve chosen your desired background:
- If you want this background to be applied to all slide layouts, ensure the “Apply to All” option at the bottom of the Format Background pane is selected.
- If you only want the background for specific layouts, select those layouts from the left pane and repeat the background setting process for each.
6. Exit the Slide Master ViewOnce you’re satisfied with the background, click on the “Close Master View” button on the Slide Master tab. This will return you to the normal slide view.

7. Review Your PresentationNavigate through your slides to ensure the background has been applied consistently. Remember, any changes made in the master slide will reflect across all slides in the presentation, ensuring a cohesive look.