


Google Slides stands as a premier digital platform for constructing presentations. As a pivotal component of the professional suite, it transforms the conventional slide in Google Slides into a refined page that encapsulates and showcases strategic ideas. However, not every slide in the presentation may align with the overall narrative. There could be a slide that you want to refine or perhaps entirely eliminate.
If you’ve been contemplating how to delete a slide in Google or are looking for different ways to delete unnecessary content using Google tools, this guide will enlighten you. Whether you operate on the Google Slides app or a desktop, whether you wish to select multiple slides and delete or find another way to delete, we will help you streamline your slideshow efficiently and fast. So, if you’re eager to learn how to delete slides in your Google Slides, you’ve embarked on the right path.
Step-by-Step Guide How to Delete a Slide on Google Slides
So, you’ve been working hard on your Google Slides presentation, and now you’re facing the task of refining it. It’s common to end up with a few unnecessary slides, but removing them should be a breeze. Ready to dive into the world of Google and declutter your presentation? Let’s delve into the details.
1. Deleting a Single Slide
- Step 1: Open your Google Slides presentation.

- Step 2: Navigate through the presentation to find the slide you want to delete.
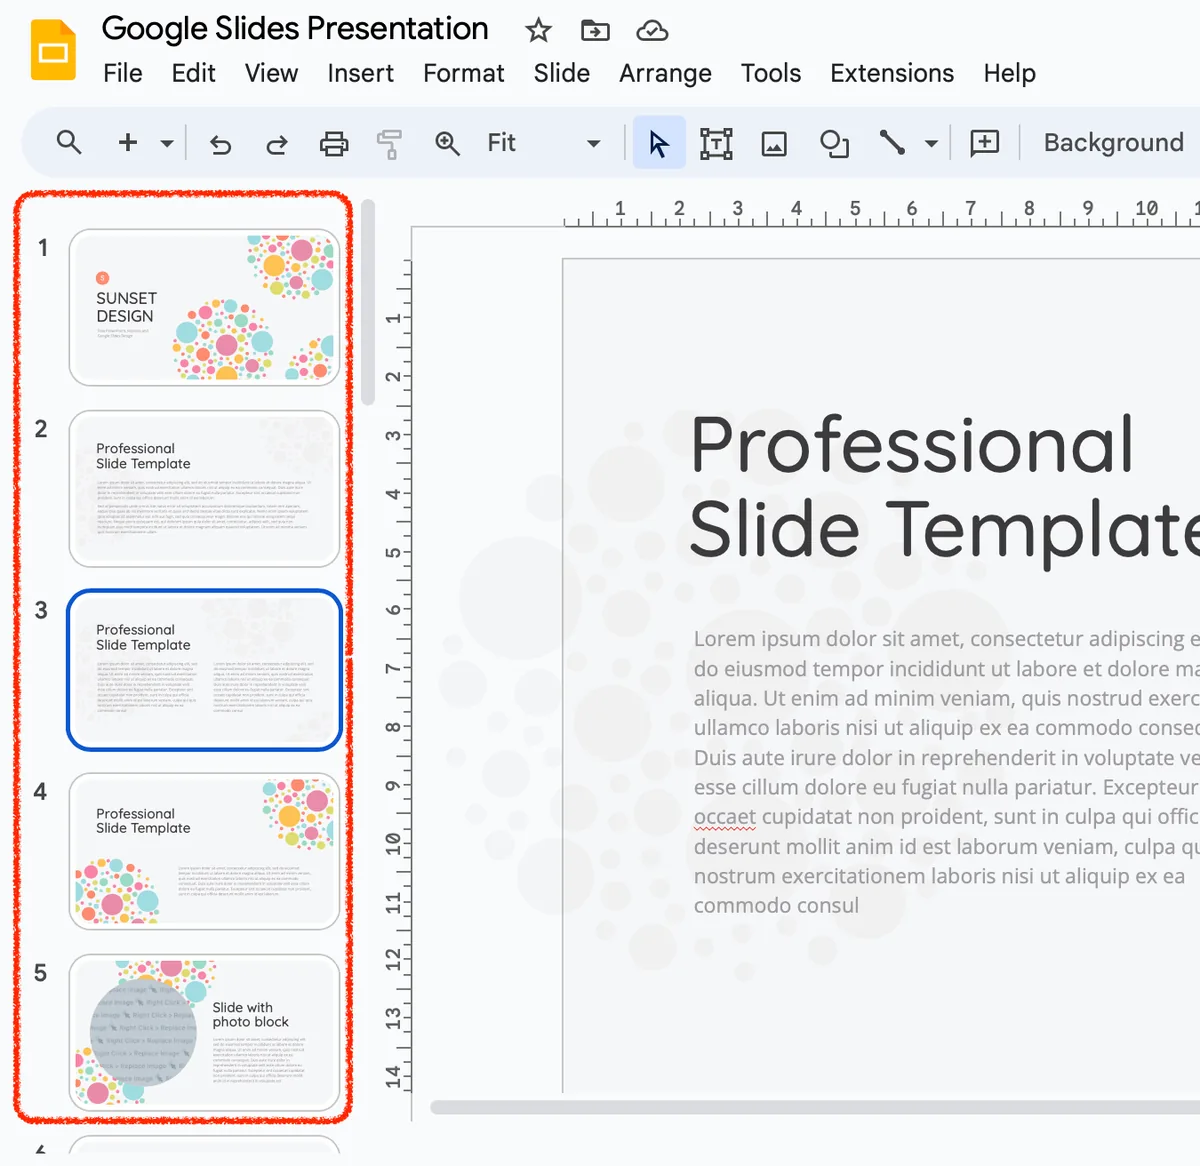
- Step 3: Once you’ve identified the slide, click on it to select it.
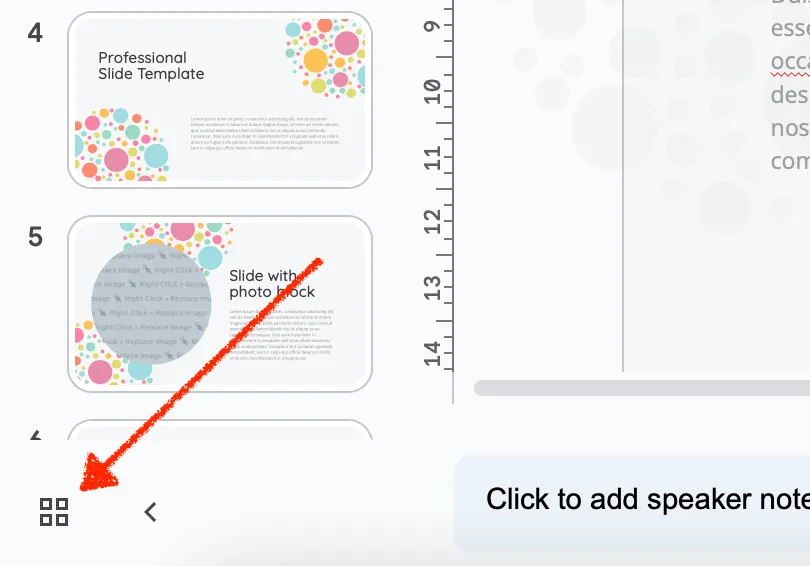
- Step 4: Right-click the selected slide in the grid view (this displays all slides as thumbnails).

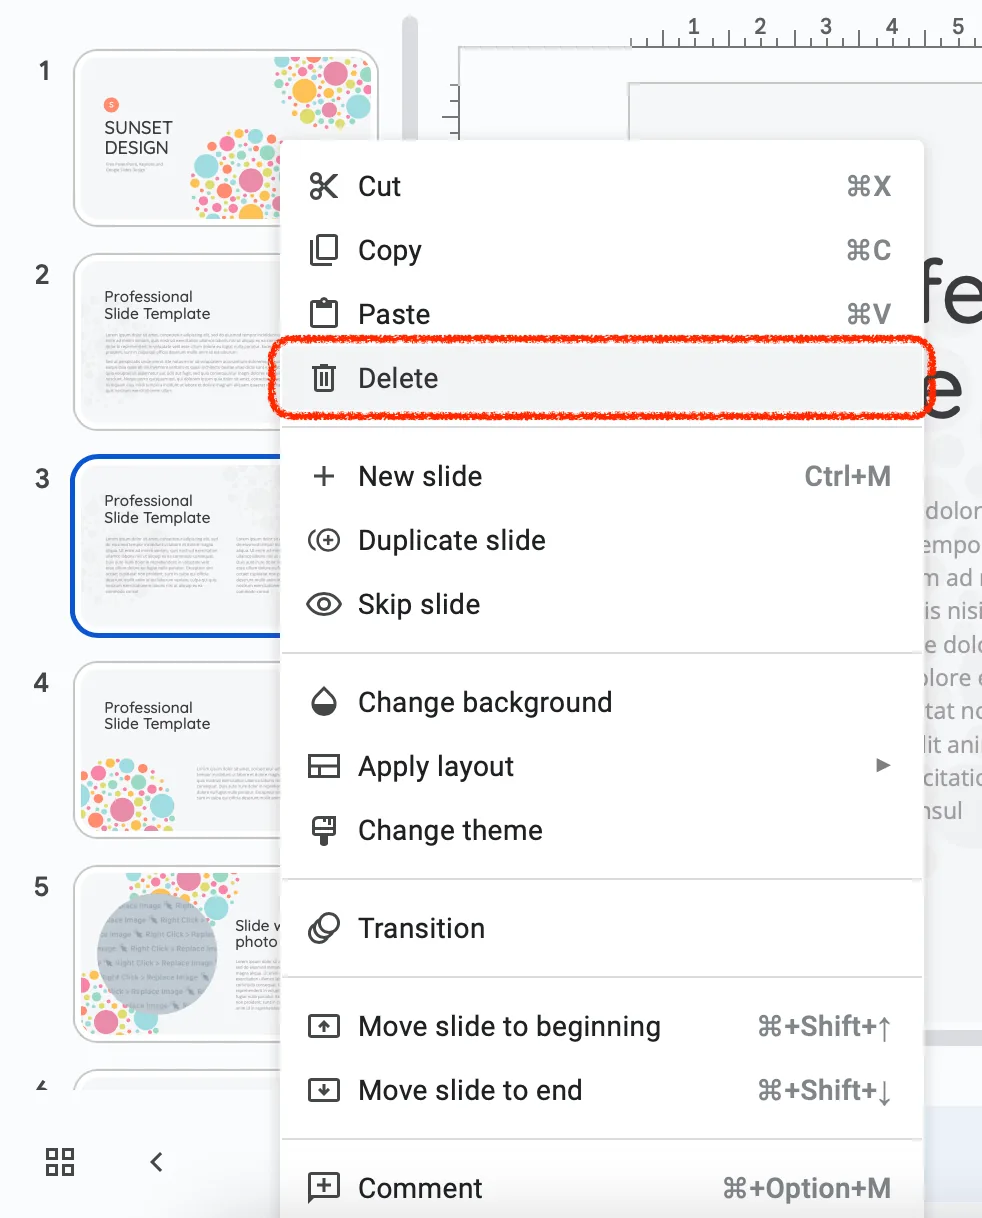
- Step 5: In the dropdown that appears, choose the delete option. Alternatively, press the delete key on your keyboard. If you’re a fan of shortcuts, and who isn’t, remember this one!
2. Deleting Multiple Slides
Have many slides you want to remove in one go? Here’s the trick:
- Step 1: Go to the grid view for an overall thumbnail view of your slides.

- Step 2: Hold down the Ctrl key (for Windows/Linux) or the Command key (for MacOS/iOS users). While holding it, click on the slides you want to delete to select multiple slides.

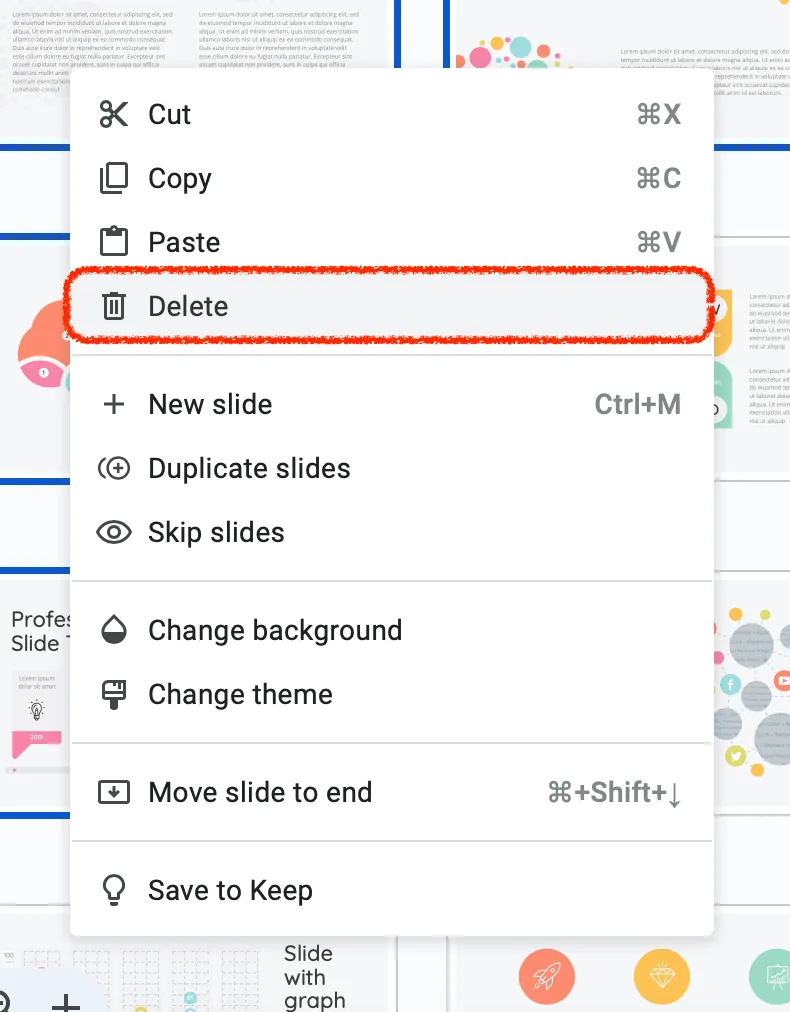
- Step 3: Once all unwanted slides are selected, right click on any one of them.
- Step 4: From the dropdown, select the delete option. Or simply press the delete key on your keyboard for a swift action.
3. Using Keyboard Shortcuts for Deletion
For those who love efficiency:
- Step 1: Navigate to the slide you want.
- Step 2: Use the keyboard shortcut ‘Ctrl’ + ‘D’ (for Windows/Linux) or ‘Command’ + ‘D’ for (MacOS/iOS) to instantly delete the slide from your presentation.
4. Additional Tips
- If you accidentally delete a slide, remember there’s always an undo option.
- Google Drive integration allows for easy saving and backup of your Google Slides using the cloud storage.
- Ever mixed up Google Sheets and Slides? Remember, Sheets is for spreadsheets and Slides is for presentations.
- For those who want to delete multiple slides but not all, ensure you only select the slide thumbnails you want to remove.
- While right-clicking is a popular way to delete slides, always ensure you’ve selected the right slide or you might end up removing crucial content!
There you have it, a comprehensive guide on how to delete a slide on Google or even multiple ones if that’s your wish. Now, with these steps in hand, you’re all set to perfect your presentation by eliminating any unnecessary slides. Happy presenting!
How to Recover a Deleted Slide
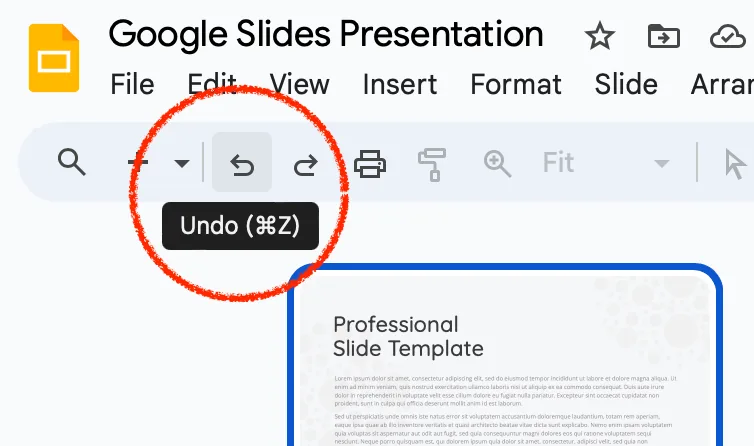
Oops! Deleted the wrong slide? No worries. Click on “Edit” in the top menu and then “Undo.” Alternatively, use the keyboard shortcut ‘Ctrl’ + ‘Z’ (Windows/Linux) or ‘Command’ + ‘Z’ (Mac).
Conclusion
Google Slides, with its versatility and user-friendly interface, is a go-to for many. And as with any tool, knowing how to efficiently add and remove elements – in this case, slides – is crucial. With this guide, you’re now a step closer to mastering Google Slides. So, the next time you have an extra slide, you know what to do, right?